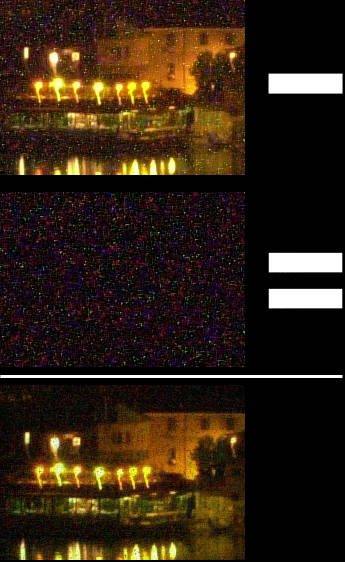
| DarClean The end is the beginning |
 We are
approaching the end of this short crash course on digital noise
reduction. I decided to call it DarClean because it involves the subtraction
of a dark image to a light one in order to get a clean photo. For
a minute or two I wondered to call it the Meozzi method, but it would have
been self-applauding
and it sounded like one of those Sci-Fi B-movies of the Fifties: "The final
solution of doktor Kranz" ... And I wasn't even sure to be the first to apply
this method to traditional digital images.
To sum up, in order to reduce the noise in your digital images, you may follow these steps:
- Shoot a photo
- Take note of its exposure time and place the cover on your lens
- Take another exposure of the same duration
- Transfer your photos to the computer and launch your favourite image processing software
- Open both images; cut & copy the dark one on a new layer, over the light one
- Subtract (selecting the difference mode on the dark layer) the dark image from the light one
That's all!
If you feel particularly bold, you can dare to follow this variation on the theme:
- Shoot two photos of the same subject with the same exposure time (of course it helps a lot if the subject doesn't move...)
- Take note of the exposure time and place the cover on your lens
- Take another exposure of the same duration
- Transfer your photos to the computer and launch your favourite image processing software
- Open the first light image and the dark image; cut & copy the dark one on a new layer, over the light one
- Subtract (selecting the difference mode on the dark layer) the dark image from the light one
- Open the second light image; cut & copy the dark one on a new layer, over the second light photo
- Subtract as above, selecting the difference mode on the dark layer
- Close dark image
- Choose Flatten Image from the Layers palette menu on both open images
- Adjust levels if necessary
- Cut & copy the first light image on a new layer, over the second one
- If necessary, reduce the opacity of the first layer between 10-30% and move it to align the upper image with the photo on the bottom layer.
- After the alignment, the upper layer opacity must be brought back to 100%
- Overlay (selecting the overlay mode on the top layer) the first image to the second one
- Choose Flatten Image from the Layers palette menu
- Adjust levels if necessary
I hope you will enjoy DarClean as I am: there are many other possibilities to further improve the quality of the images. I will surely post on these pages the results of my tests. In the meantime, please let me know what you are thinking about it!
Thank you
Diego Meozzi
P.S.
If you are curious, have a look at the Stone Pages, my main website devoted to European ancient stone monuments